

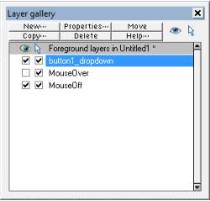
Open the layer gallery and select the New Button to insert a new layer. Name the layer and click on OK. The new layer
must reside above the existing MouseOff and MouseOver layers
Figure 2 - A new layer has been created above the MouseOff and MouseOver layers
The new layer, named button1_dropdown in this example will contain the drop down
menu.
Ensure your new layer is selected and create a sub-menu container for your sub
menus.
Figure 3 - A semi-transparent rectangle has been created that
will show through whatever is below it (such as this text), it
has a soft (wall shadow) shadow, that is also properly semi-
transparent making the drop-down appear to float over the
page.
Position the rectangle below the button which will be used to cause the drop down to display. Next, select the button and
click on the link icon from the website tool bar causing the link tab of the Web properties dialogue to display. Select the
mouse-over tab and click on the show popup layer drop down list. Select the new layer created earlier prior to clicking
the apply button or OK button to apply the changes.
If you preview your page now, you will find the rectangle only displays when mousing over your button.
The first step is to create a button. Select a button design from within the Design gallery or create your own button by
following the button bar tutorial
We will use the button bar from the button bar tutorial to demonstrate how to apply sub menus to your button bar.
Figure 1 - Button bar from the button bar tutorial with meaningful button labels applied


Cascading menus